Retiring Tokens
Once you have connected your wallet and have enough CPCO2 tokens you can now retire your CPCO2 tokens. Each CPCO2 token represents one actual tonne of carbon locked away in the ground. Steps in retiring your CPCO2 tokens are as follows:
Open Retire tab
Open Retire page by clicking on Retire Button.
You can also open Retire tab directly from Well View. Click on the well you want to retire to, then click the “Retire CPCO2 Tokens” button below when in the Well Overview. This way, selected well will be automatically updated.
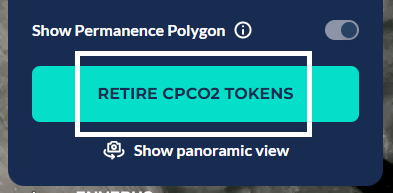
Opening Retire tab from Well View
Optional: Select Well
This is an optional step. By default, CarbonPath selects the well with the least number of retirements. To change which well you want to retire your tokens at, click “Yes” to toggle the Retire Token to specific well. This will show a search bar and a dropdown list of all available wells. Search and select the well of your choice. The currently selected well is visible along with the maximum number of tokens it can accept.

Toggled Retire Tokens to specific well
Enter Retirement amount
Input number of tokens to be retired or select a percentage of your token balance. The following are consired for a valid retirement input:
Numerical input up to two decimal places
Input should be at least 0.01 CPCO2 tokens
Input is less than Max value which depends on your CPCO2 tokens and token limit of well
Then, click Retire CPCPO2 Tokens to continue with transaction.
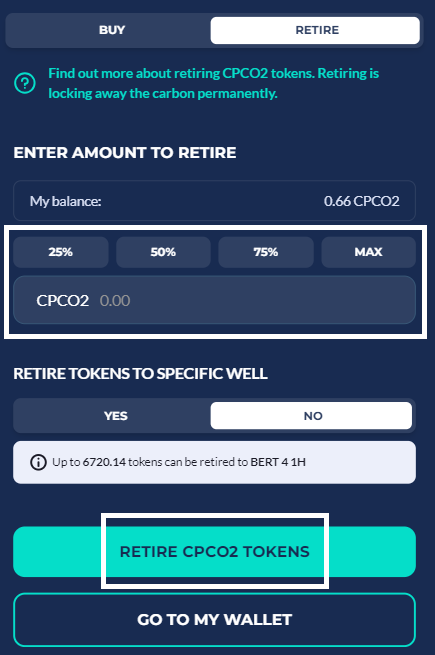
Retire Input
Confirm Retire transaction
Retire Summary shows retirement information before proceeding. Click Confirm to proceed. Click Back to return to Retire Input.
Retire Processing screen will be shown once Retire Summary is confirmed. Depending on how you connected your wallet, Retire Processing may proceed automatically. Otherwise, click Initiate Retire and confirm pop-ups in your wallet to proceed. Progress of each step is shown (completed = check mark).
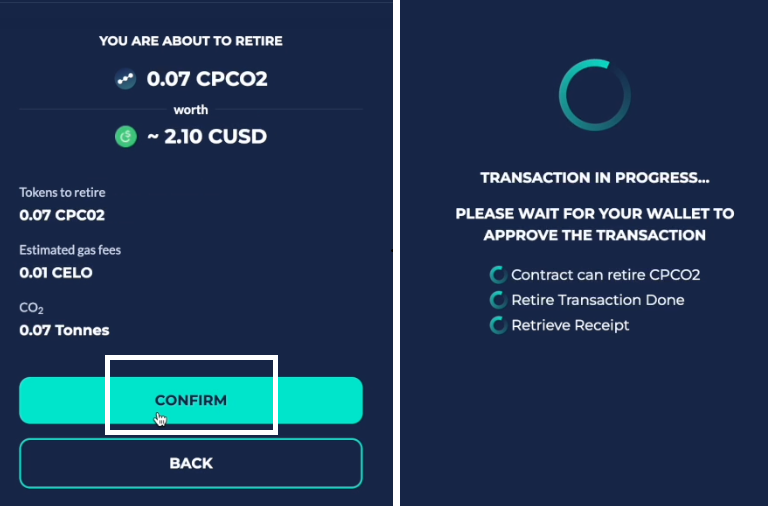
Retire Summary
Retire transaction Result
After waiting for Retire transaction to finish, a Retire Success/Error screen will be shown. For desktop, you can click your balance on the header to refresh if it remained the same after the transaction – delays depend on network and blockchain traffic.
Retire Success
Once a retire transaction is completed, a recap will be shown along with its equivalent impact. An invoice for your transaction will then be available for download. Click Done to finish transaction and reset Retire tab. Click Total Impact to reset retire screen and redirect you to the Impact section.
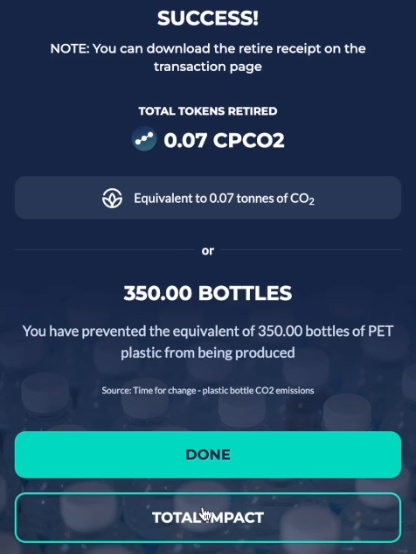
Retire Success
Retire Error
Should any error be encountered while processing the transaction, the retire screen will be shown with the corresponding error message. Click Try Again to return to Retire Input screen.